Thursday, December 27, 2012

Merry Christmas & Happy New Year

Merry Christmas and Happy New Year to all my followers - I hope you enjoy any holiday activities!

Being retired in stead of getting into modelling during the holidays - I'm having a break!

Progress on the layout in December was nonexistent as my Son had his wedding in Melbourne (some 800 kilometers from home) so with the preparation and two weeks away then getting home just before Christmas with the family coming to ours for Christmas Day the layout room door has been closed.

Whilst away in Melbourne I was able to spend a few days with my mate Peter in Traralgon and we managed to visit some hobby shops and load a Digitrax sound project for my recently acquired Proto 1000 RDC.

January is always a quite month for modelling, but I hope to get something done during the time my wife is at home on holiday.


Till the end of January.

-ooOOOoo-

Friday, November 30, 2012

November Progress

.
This month has seen further work on ballasting, trial run of the RDC, land forms at the helix approach, Trackside buildings, Upgrading Command Station & Throttles, Maintenance and Operations Trials.

If you have not seen BJ's work at the Sandagte & Southern it is worth a look.

Ballasting

The application of base material, ballast and ground cover including small bushes is generally completed before the wetting down and gluing commences.  My scenery guru BJ believes this is the most efficient method for large areas requiring scenicing.

Mainlines behind Flintston


The base material, a sifted quartzite sand bought by the bucket load from a bulk garden supply company much cheaper than purchasing commercial scenic materials. The material will generally pass a 3 mm screen and the larger pieces trapped in the sifter are used for rocky areas across the layout.


Picard Junction


This area is one of the most complex track work sections - it is not that bad really! Looking on the left hand side the two tracks [1 outside loop & 2 inside loop] by the backdrop are the double track mains on the dogbone, the third one [3] is a passing siding (which is a reverse loop) between the inner loop tracks of the dogbone  [front track 4 and back track 2]. The next track is the outside track of the dogbone [5 outer loop front]. The three remaining tracks relate to Flintston track [6] is the yard approach track from the main [5 outer loop front] the remaining two [7 & 8] are loading tracks for a cement hopper.

The tracks in the upper right are the loco arrival/departure roads and the "Y" are the tracks forming a reverse loop for turning complete trains and also serves as the entry point from hidden staging under the lower level of the  main layout.  The bridge section in the lower right is the Huntington Branch before it enters Daveyston.


Hornertown East


BJ painted the ties and then started applying the ground cover.


RDC Trial Run

Last month I talked about installing the sound decoder in my new RDC some simple test running proved its operation.  It visited Ross Picard's Willunga layout for a running session at the round robin this week.


Helix Approach

The basic scenery structure has commenced with the installation of retaining wall backing and basic land forms for mainlines and the tracks, old decommissioned (over bridge) and new (through the cutting),  leading to the helix


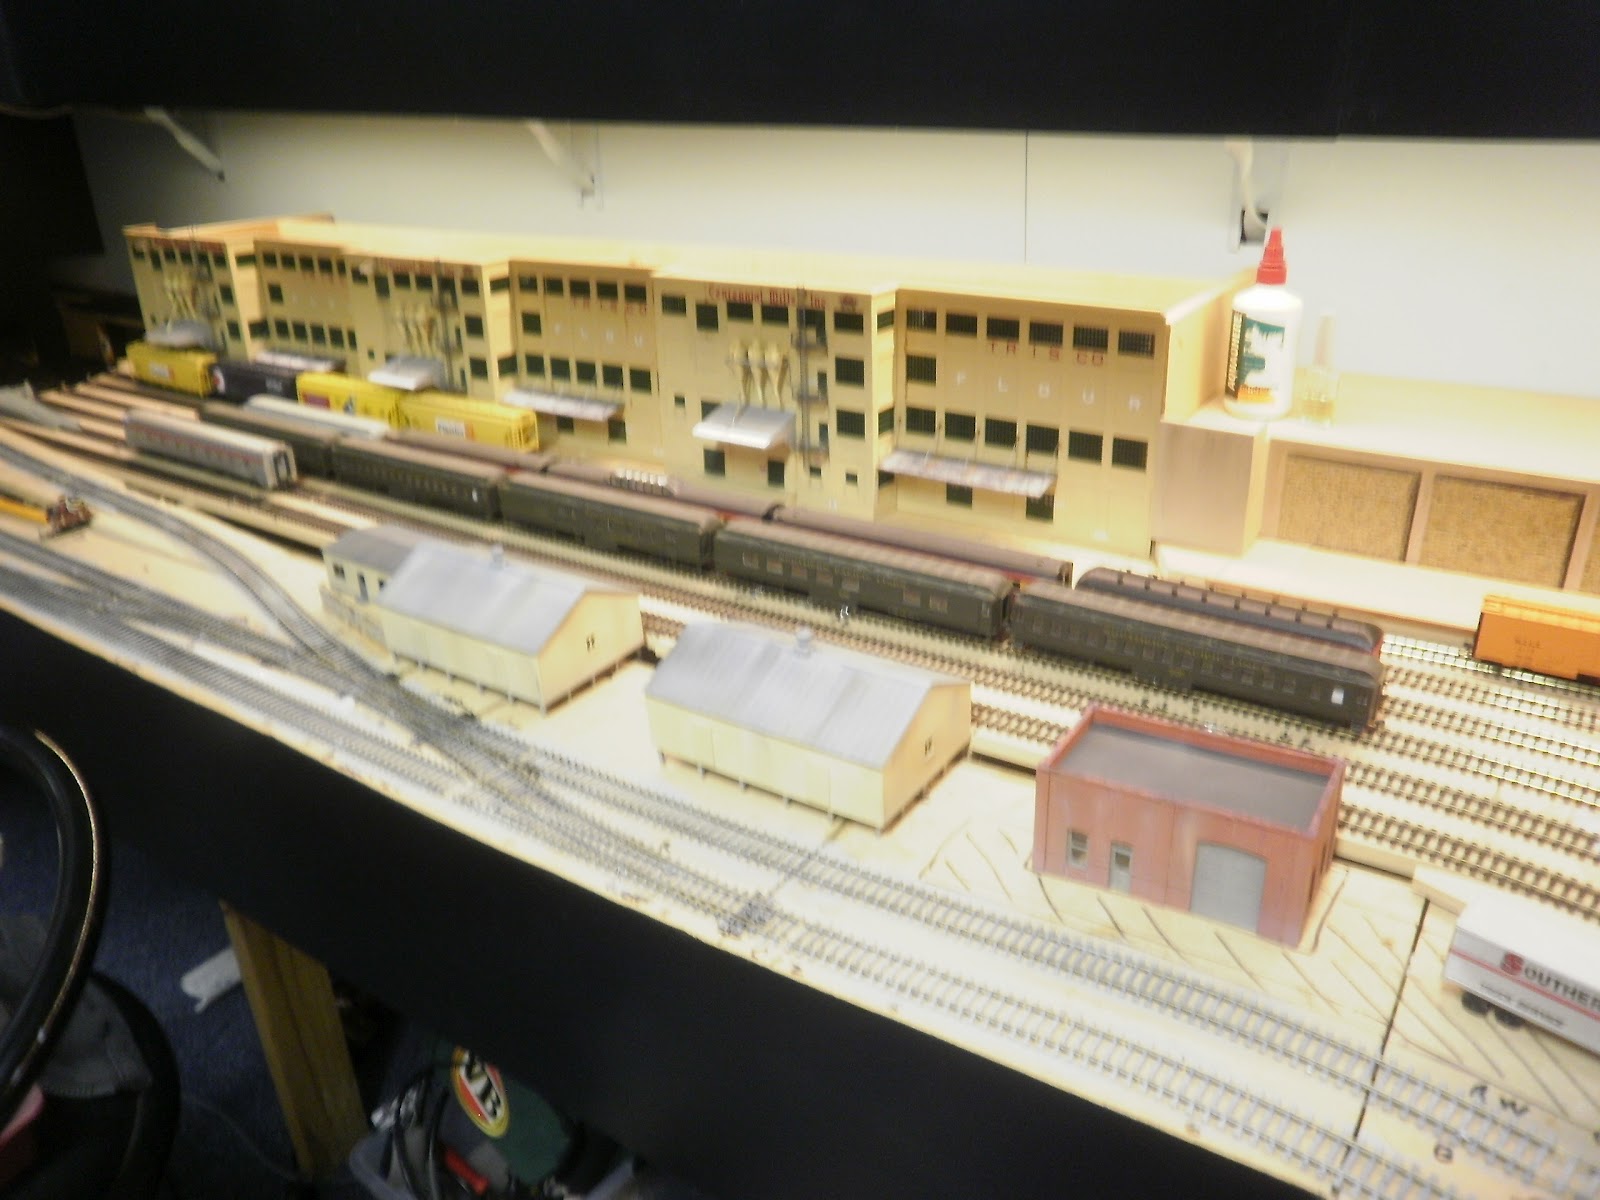
Hornertown Track side Buildings

We just added some detail stuff.


Upgrading Command Station & Throttles

Some time ago I purchased a new "system heart" to upgrade from the multiMAUS to multiMAUSpro to provide wireless capability.  I decided not to implement the change over until the basic DCC bus and control panels were installed and operating - the idea was that if I was going to blow something  up let's make it the basic stuff.

Whilst I was slowed down by a virus causing my intestinal tracks some upset I decided to upgrade the firmware on my new Roco multiZENTRALEpro, two multiMAUSpro's and seven multiMAUS's. This will allow me to address functions 11-20 on my recently acquired locos. The multiZENTRALEpro has wireless capability and the two "Blue" multiMAUSpro's are the wireless throttles.
I was pleased when everything worked first time after the upgrade process but some power cut out issues still plagued me see Operations Trials below....


The wireless throttles mounted on the fascia.


Maintenance Issue

It appears my fitting of an accessory switch to a point motor some three years ago could have been better and it was binding the mech enough to stop good operation causing some issues.  I had to enlist the help of our smallest member of our round robin group work over the bottom level yard and under and at the very back of the top level.

Chris laying down on the job....


After removal of the point motor and "doctoring" it now works perfectly....

Operations Trials 


I have continued to encounter a spasmodic electrical fault when the current load got to about 1.7 amps. It was repeatable in all booster sections and they are rated at 3.2 amps each. Following more investigation I discovered in the multiZENTRALEpro manual a sentence that said "the overload light will illuminate if the power supply to the booster is overloaded" so the overload indicator will illuminate even if the DCC bus is not at rated load (the same sentence is not in the multiMAUS manual). This caused me to check the power transformer ratings. Sure enough they said 3.3 amps when BOTH secondaries are connected in parallel - I seemed to have missed this when I bought them about five years ago. It is not until high load testing (10 - 12 concurrent operating locos) that the problem appeared. So the transformers are half the required power rating.
I had some old Laptop power supplies which suited requirements so they have been commandeered!

After re-reading all the other manuals PSX, PSX-AR, Block Watcher I identified another flaw in my installation - the PSX's were all still at default 3.8 amp threshold   So they all had to be set to 2.54 by programming each one. There were just a few to do....


Chris decided there have not been enough photos of me so he took this not-very-flattering photo and I was instructed that it had to appear. So here it is, me inside the helix installing the Laptop power supplies.


Thanks to those that continue to help me achieve my ambitions..

Till the end of January.

-ooOOOoo-

Wednesday, October 31, 2012

October Progress

This month has seen a bit of a slow down as September seemed to be "a bit too busy" as a result a few of us nearly "hitting the wall" but others did - Good to see Ros is getting back on her feet. 

Despite this some further work on control panels, more ballasting, programming BJ's Empire Builder Locos, the commencement of many operation trials, a visit by BJ's grandson some more rolling stock unpacked, an update on the Aux-Box problem and RDC Decoder install.

Control Panels

During the first operation trial Chris found himself moving between the length of Hornertown yard a number of times which will be significantly reduced with the wiring of the West & east sub panels so the operators do not have to do all turnout controls from the center of a 8 metre long yard.

Hornertown

The double slip indications have been installed.


Circuit boards from Top to Bottom: CD unit, 12v regulated power supply, double slip status.


Wiring Looms

Two control Panel sets down and one set to go!

  • Hornertown West one set of 6
  • Flintston 2 sets of 8 and one set of 4


Hornertown West

The six core feeders to the point motors have been installed and terminated and the panel wiring awaits.


Hornertown East

The six core wires have been installed but all still need terminating at the control panel end.  The control panel has been temporarily removed to limit the long reaching whilst doing scenery work in the South East corner of the layout ad the bottom decks are 3 feet deep so the reach in the corner is bad enough!


Hornertown East control panel remains...

Ballasting

Hornertown Yard

BJ started and had completed a small section on the western end.


On a subsequent Monday night round robin Chris and Bill2 laid and spread the base ground cover material ready for BJ to add colour textures and light vegetation.

Chris ad BJ then glued the whole lot on the following Tuesday work session


Mainlines behind Flintston

The back tracks (the darker ones) are the rear tracks of the folded dog-bone double track main in the Southwestern corner of the layout. The front two are the same tracks returning from the "blob" end and the middle track emanating from the turnout on the right is a reversing section also forming a passing track in the middle of the two sets of dog-bone mainlines.


BJ's Empire Builder

I can't remember how long BJ had been talking about his Empire Builder - must be a decade or two! - well he has always said my layout would be big enough to actually run it so like the Sandgate & Southern Sunset Limited it has come to visit during our shakedown operations.  The first task was to speed match the locos which had been collected over the years. Then we had a bit of fun....

Programming Locos

This one tested me a bit as there were 4 different decoders in 3 different manufactures equipment. (R to L in photo) F7A Proto 2000 QSI F7 with Mars, F7B Proto 2000 QSI F7 without Mars, Intermountain F7B with LokPilot 3.5DCC and an Athearn Genesis with a Lenz LE1014.  Even the two QSI's were not speed matched even though they were bought as a set.


Test Running

The video is self evident


Operations Trials

In order to establish train schedules I will need quite a bit of info to be gathered on operational aspects over the coming weeks. Chris commenced the proceedings with the time to shunt twelve reefers from the arrival departure tracks to the icing platform and return. Using the the methodology that each pair of cars need to be stationary at the icing platform for 30 seconds to enable loading the process took 25 minutes from disconnection of the mainline loco until its re-connection.

I have encounter a spasmodic electrical fault when the current load gets to just under two amps.  It is repeatable in all booster sections.  The boosters are supposed to be rated at 3.2 amps each.  More investigation is required here.....

Visit by BJ's Grandson

BJ had the pleasure of spending some time with his young Grandson who visited South Australia from Brisbane during the school holidays. I was requested to have some trains running for him to see.

Rolling Stock Unpack 

Some coaches have appeared in the coach yard....


Solution to Aux-Box problem

Last month I indicated that my Roco DCC system did not seem to want to operate the Aux-Box's I'd bought.  Well after asking the manufacturer who quite rightly responded with "is the Roco system NMRA DCC compliant" I asked my LHS who referred me to the Australian manufacturer's representative in Sydney who responded "fully compliant" I realised that I mus have missed something somewhere.  Well I found all the manuals and sure enough I had.  The Roco system accessory decoders work off the Xpressnet bus not the DCC bus!

It is safe to say the Roco / Fleischmann DCC systems are NOT compatible with the AuxBox product.

The solution was to take my spare Roco system heart into the modelling room and hook it up to the Lenz LIUSB-Ethernet interface and replace the MRC Prodigy Squared system I had been using with my SprogII and DecoderPro and use it to control a separate DCC Bus for the accessory decoders.  I am only using the accessory decoders for roundhouse & staging track power control and a illuminated Miller sign and a track side sound module.

The MRC system was placed next to the main control panels which is where the staging and Roundhouse tracks were to be controlled from anyway.  Not a perfect but a workable solution.


RDC Decoder Install

This was my first sound decoder install!   and I learnt a few things along the way.....

I used a Digitrax SDH164D decoder as they are the only manufacturer that has a sound scheme for a RDC.

I gutted the factory DCC Ready board and light bulbs and replaced with the SDH164D and LED's.  I still have all the functions other than forward/reverse lights to do at a later stage.

In order to load the sound scheme I need access to a Digitrax PR3 or similar connected to a PC in order to replace the existing sound bites on the decoder and this will be achieved when I visit my mate Peter at Traralgon in December.

I am sorry I did not take any photos showing the installation - perhaps I'll do some when I put the red tail lights, interior lighting and passengers in at a later date.

The finished product.


Thanks to all those that continue to help me achieve my ambitions..

Till next month.


-ooOOOoo-